JetBackup 5 is the restore system used on Napoleon servers. It allows you to recover files, databases, email accounts, cron jobs and, if necessary, the entire account. The goal is to guide any user, from beginner to advanced, to restore their website safely.
1. ACCESSING JETBACKUP 5
Inside cPanel, locate the Files section and click on JetBackup 5.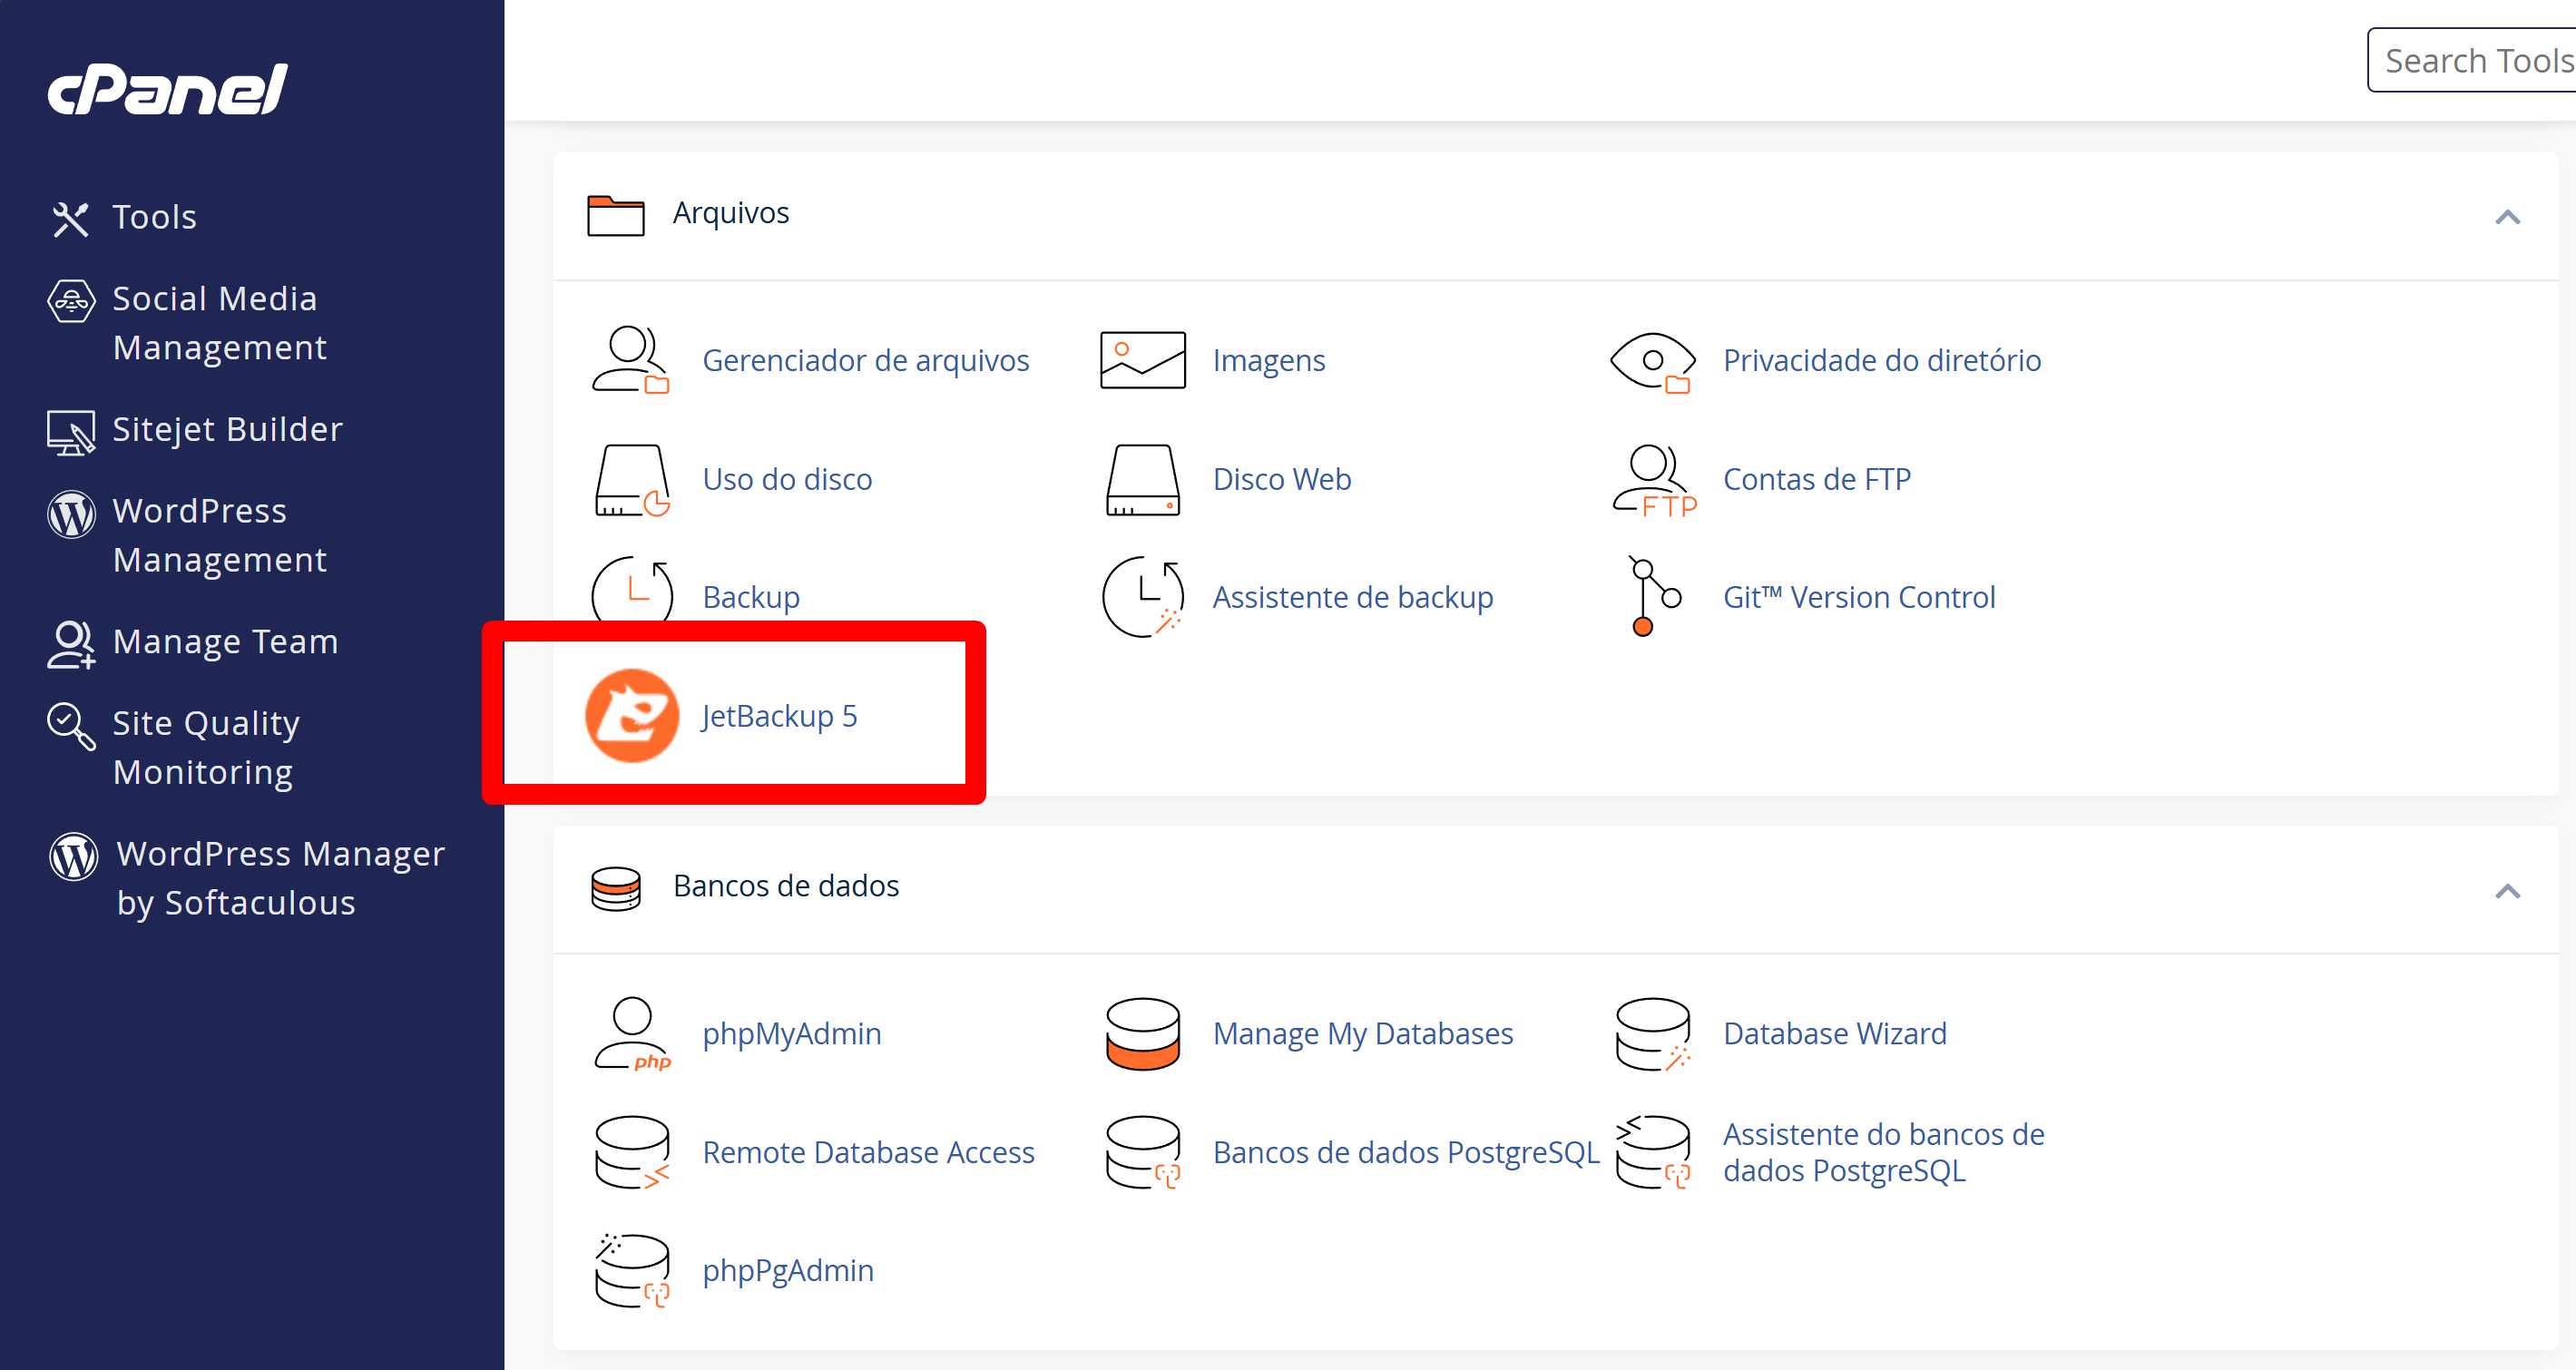
The initial screen displays the number of backups, alerts and the restore menu. Each item represents a type of content that can be recovered.
2. RESTORE THE FULL ACCOUNT
The full restore returns the entire hosting structure to the exact state of the selected backup. This includes files, databases, emails, domains and settings.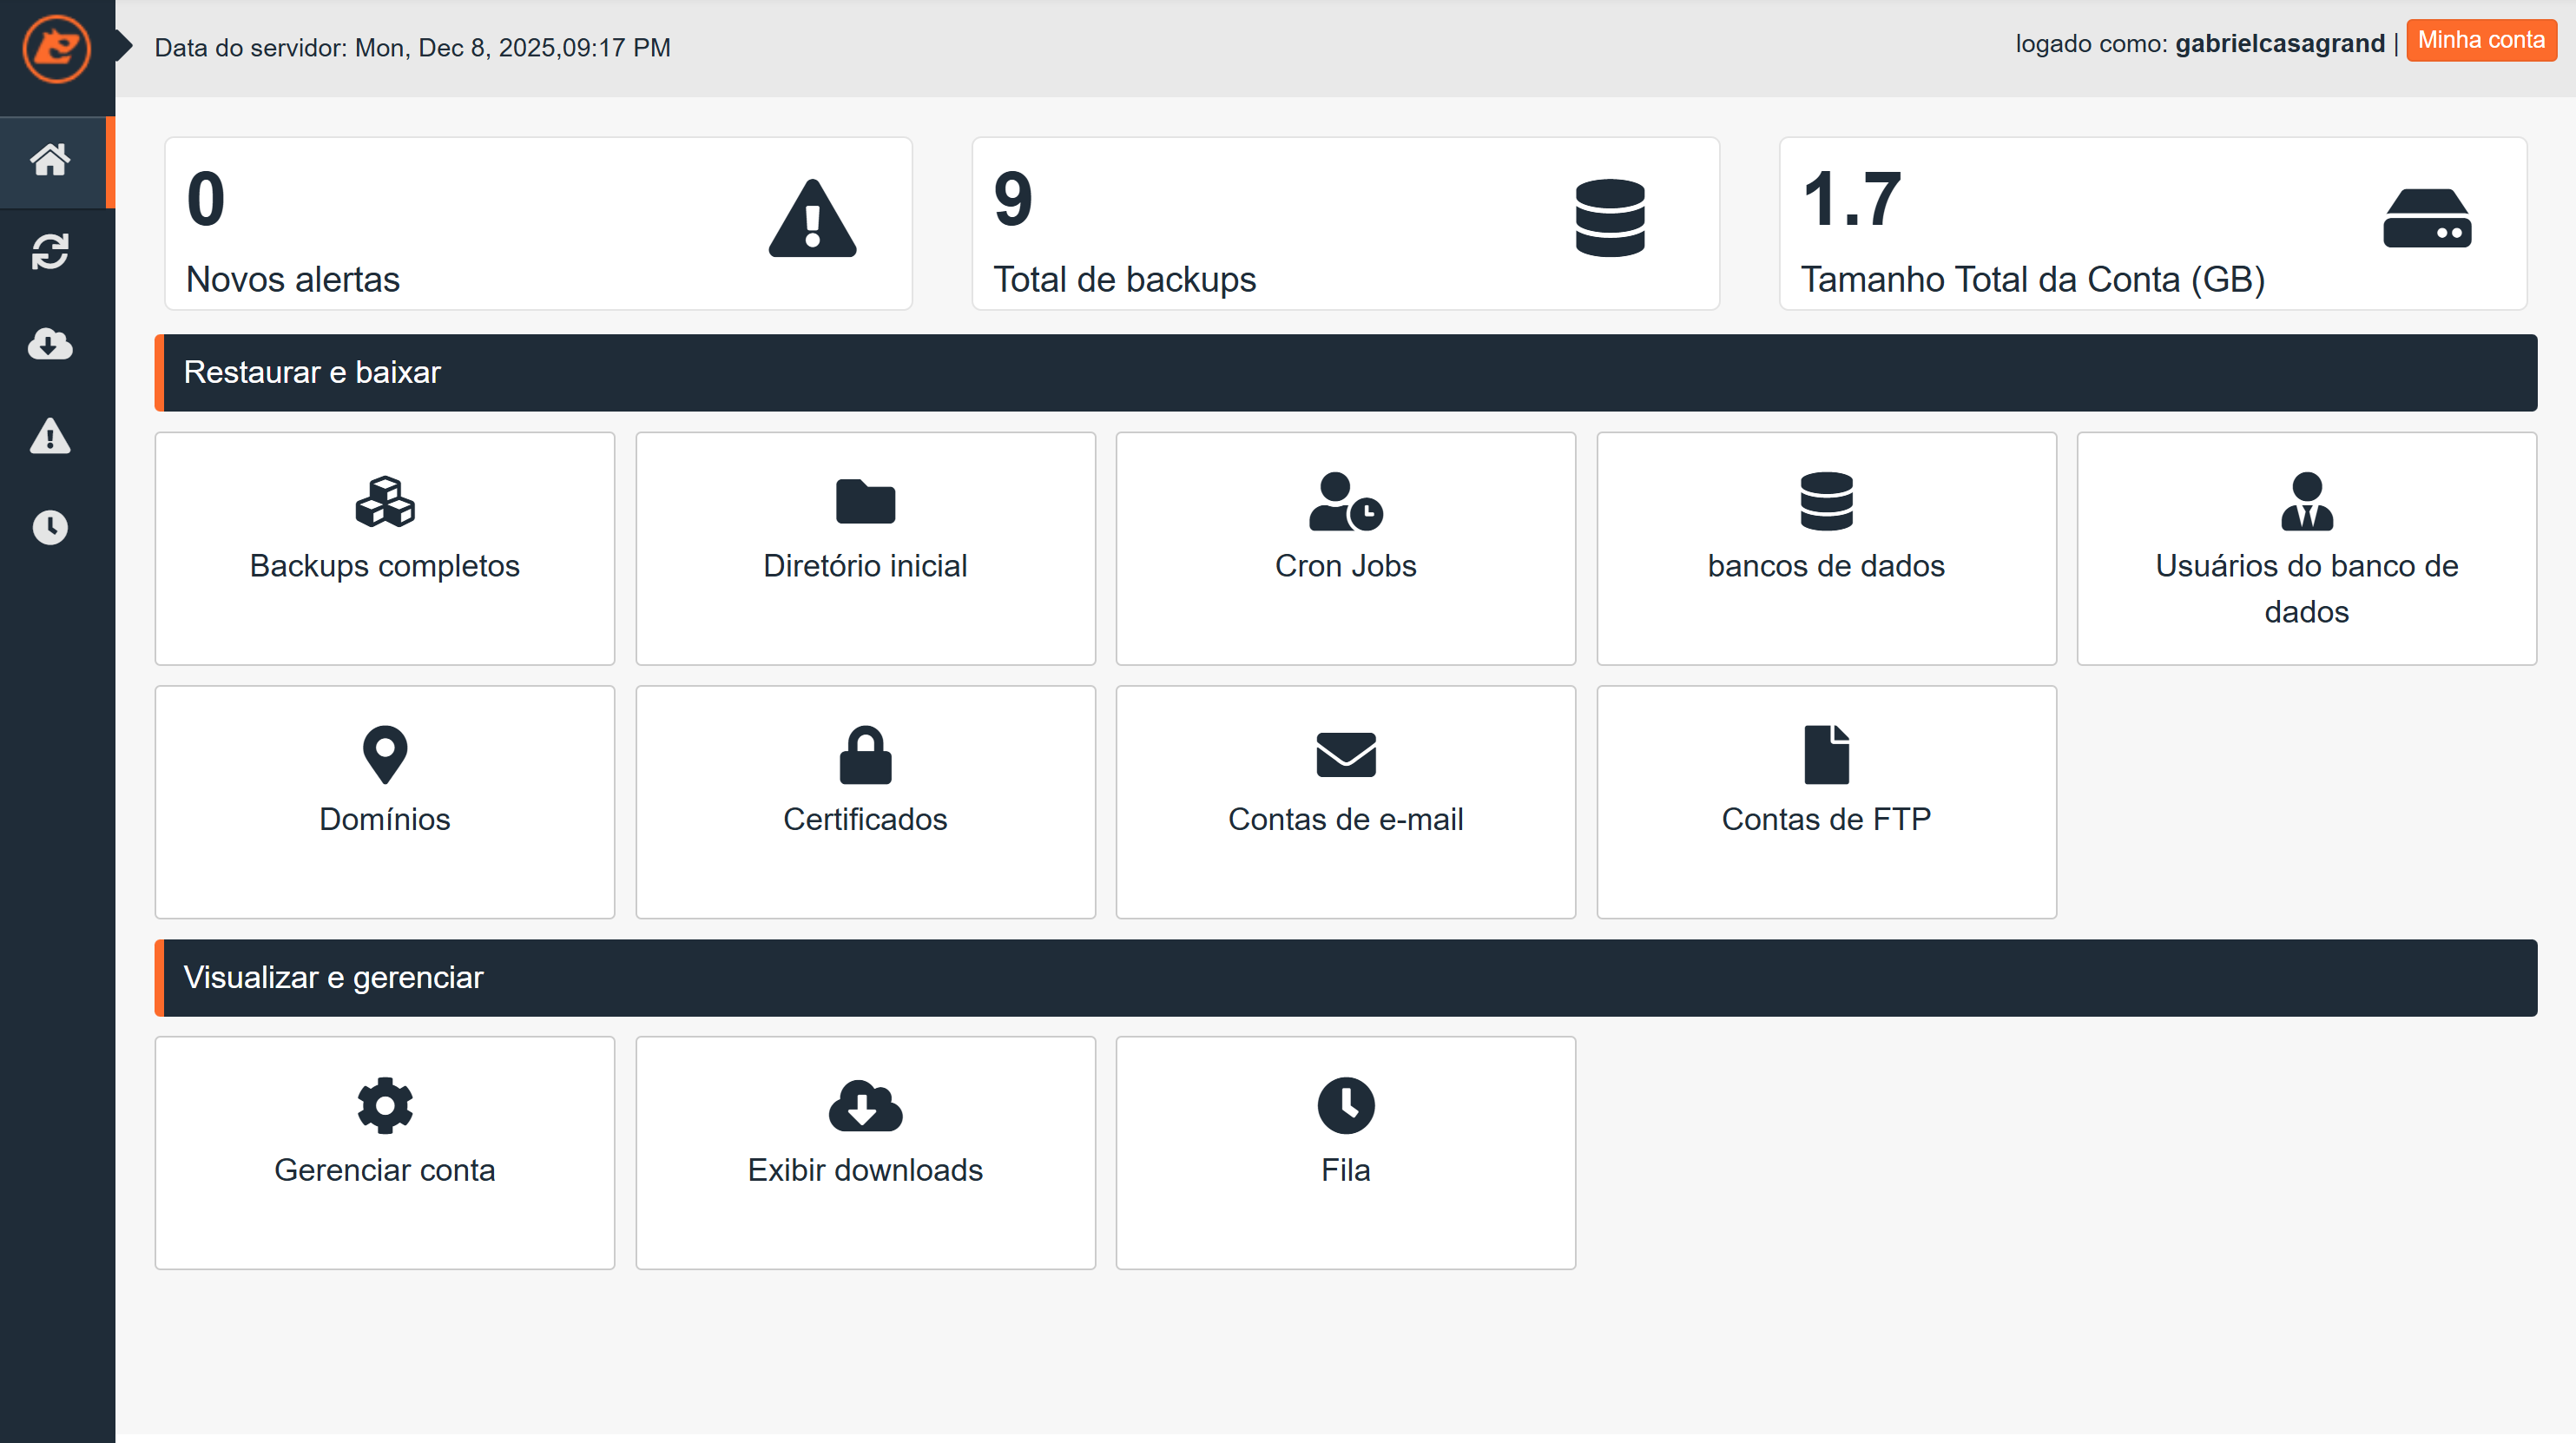
Steps:
-
Access Full Account.
-
Choose the desired date.
-
Click to restore.
-
Confirm.
The action enters the task queue. Wait for it to finish before changing any file or setting in cPanel.
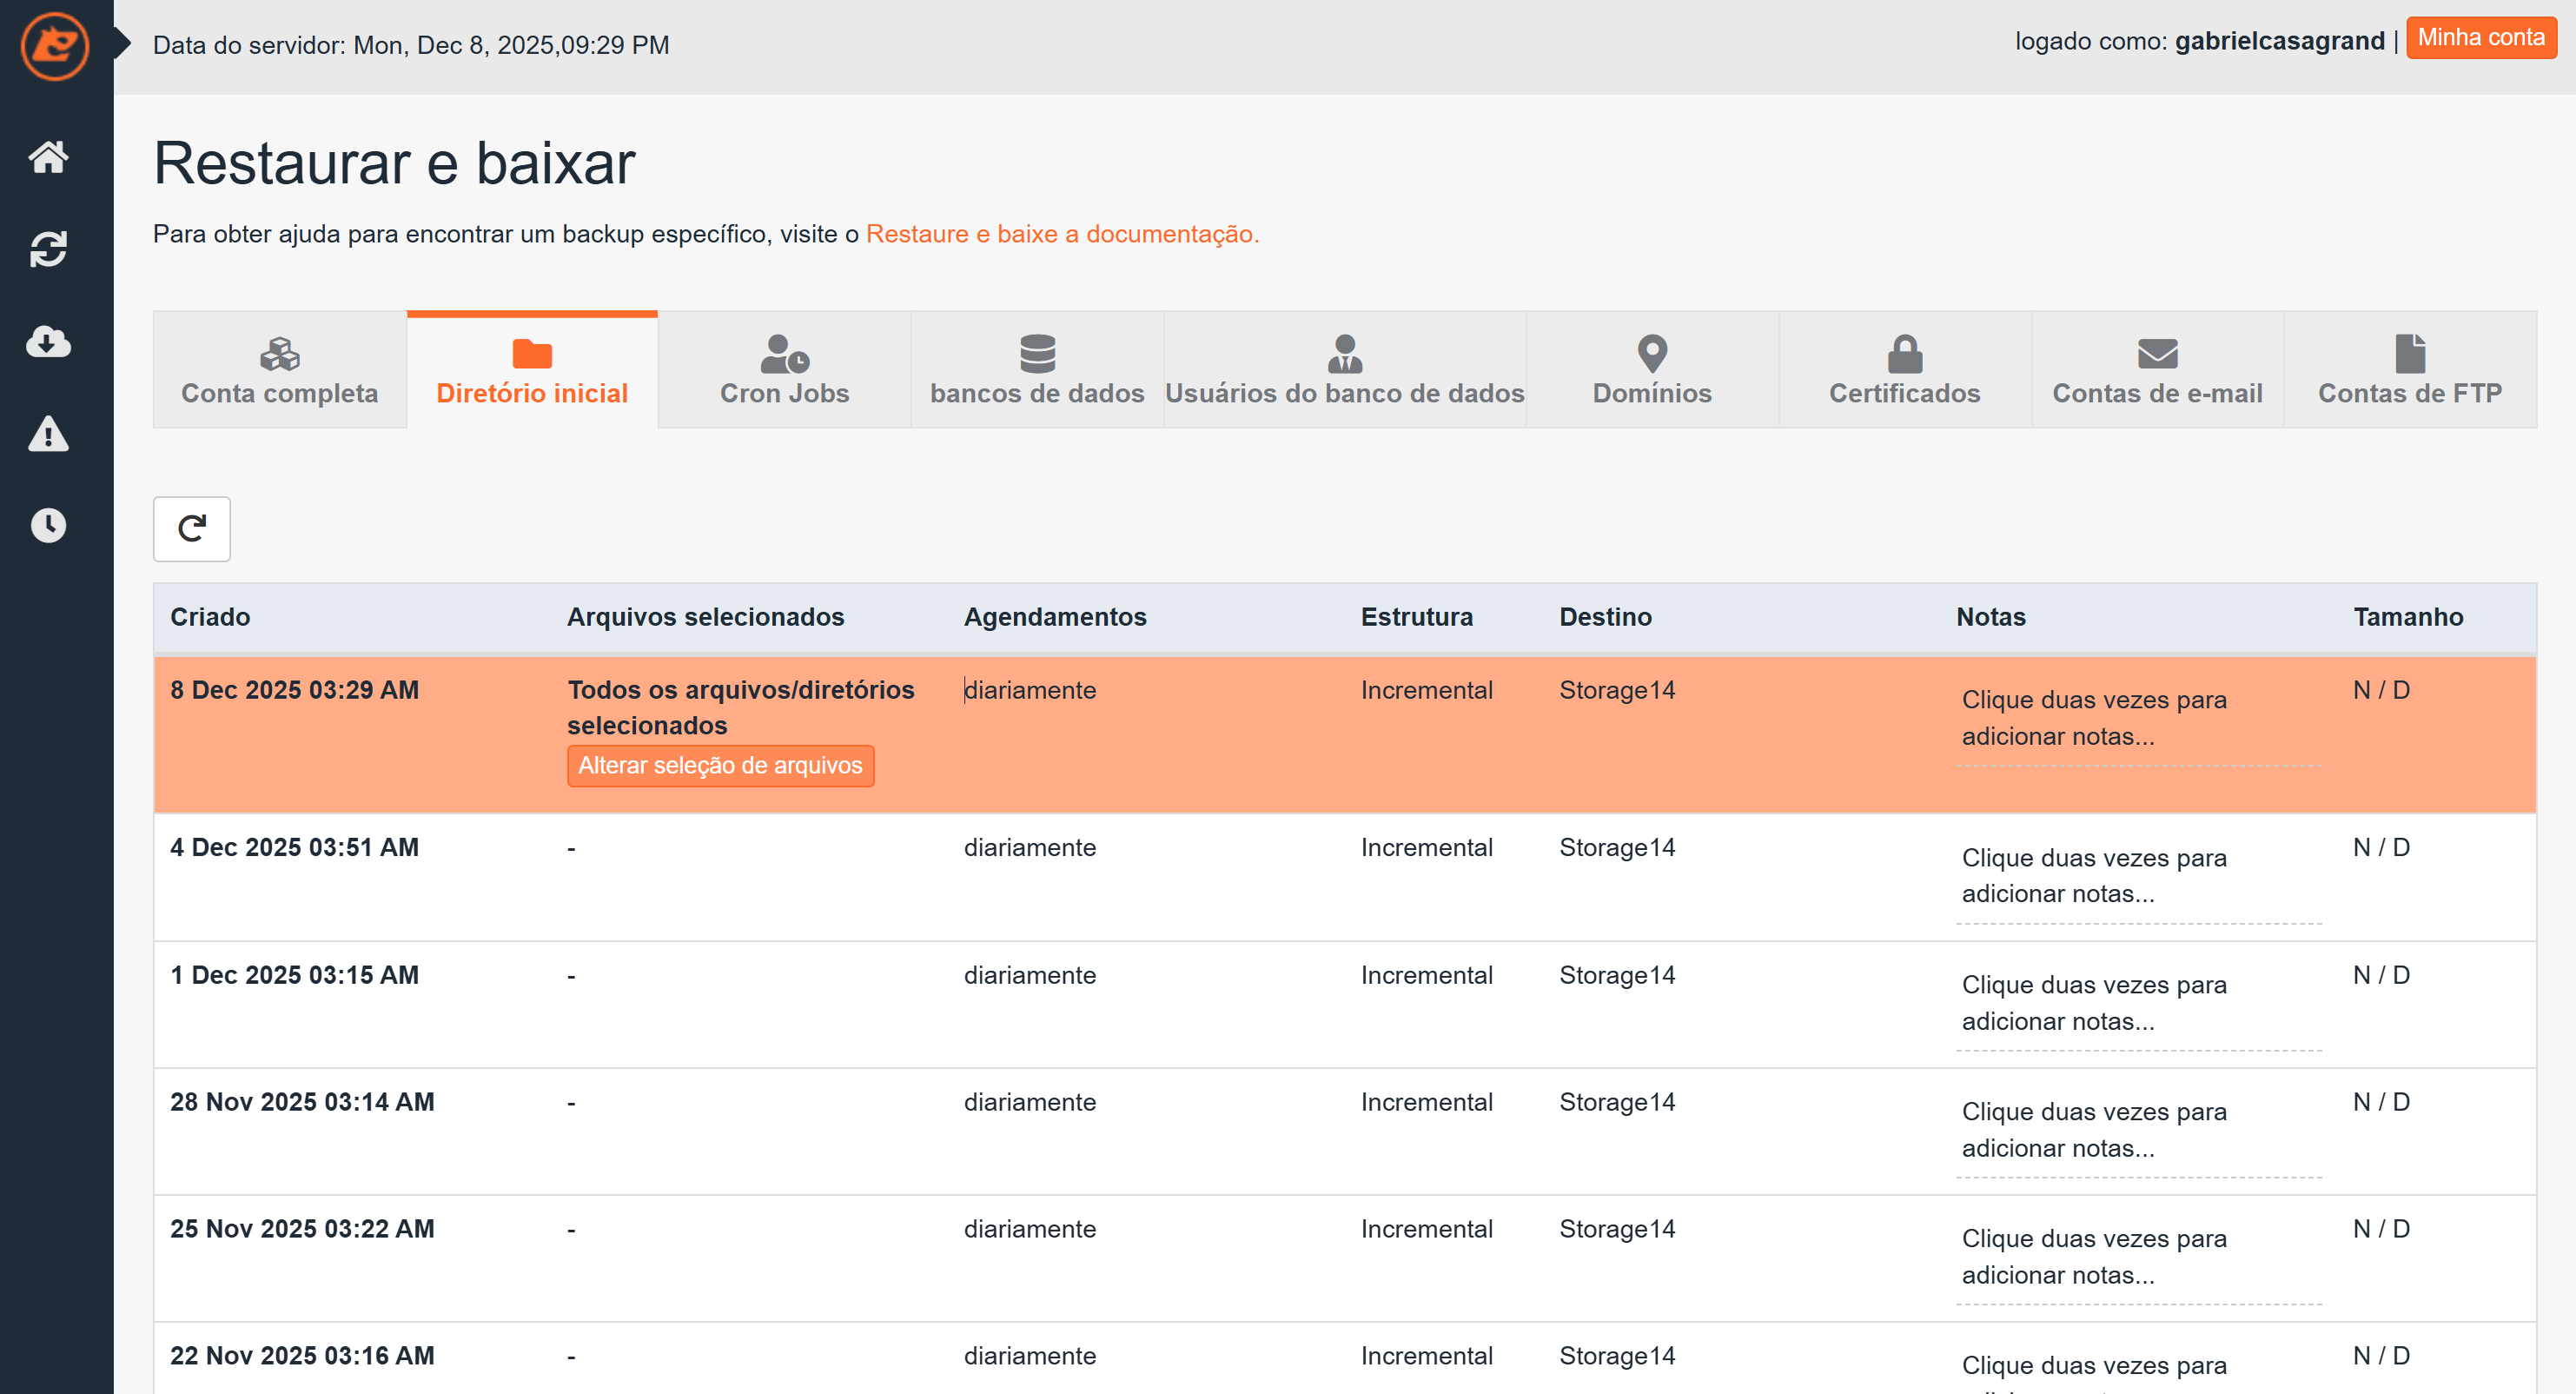
3. RESTORE THE HOME DIRECTORY (public_html)
The Home Directory contains the website files. The restore can be full or partial.
The full restore overwrites all website files.
The partial restore allows you to choose specific files or folders.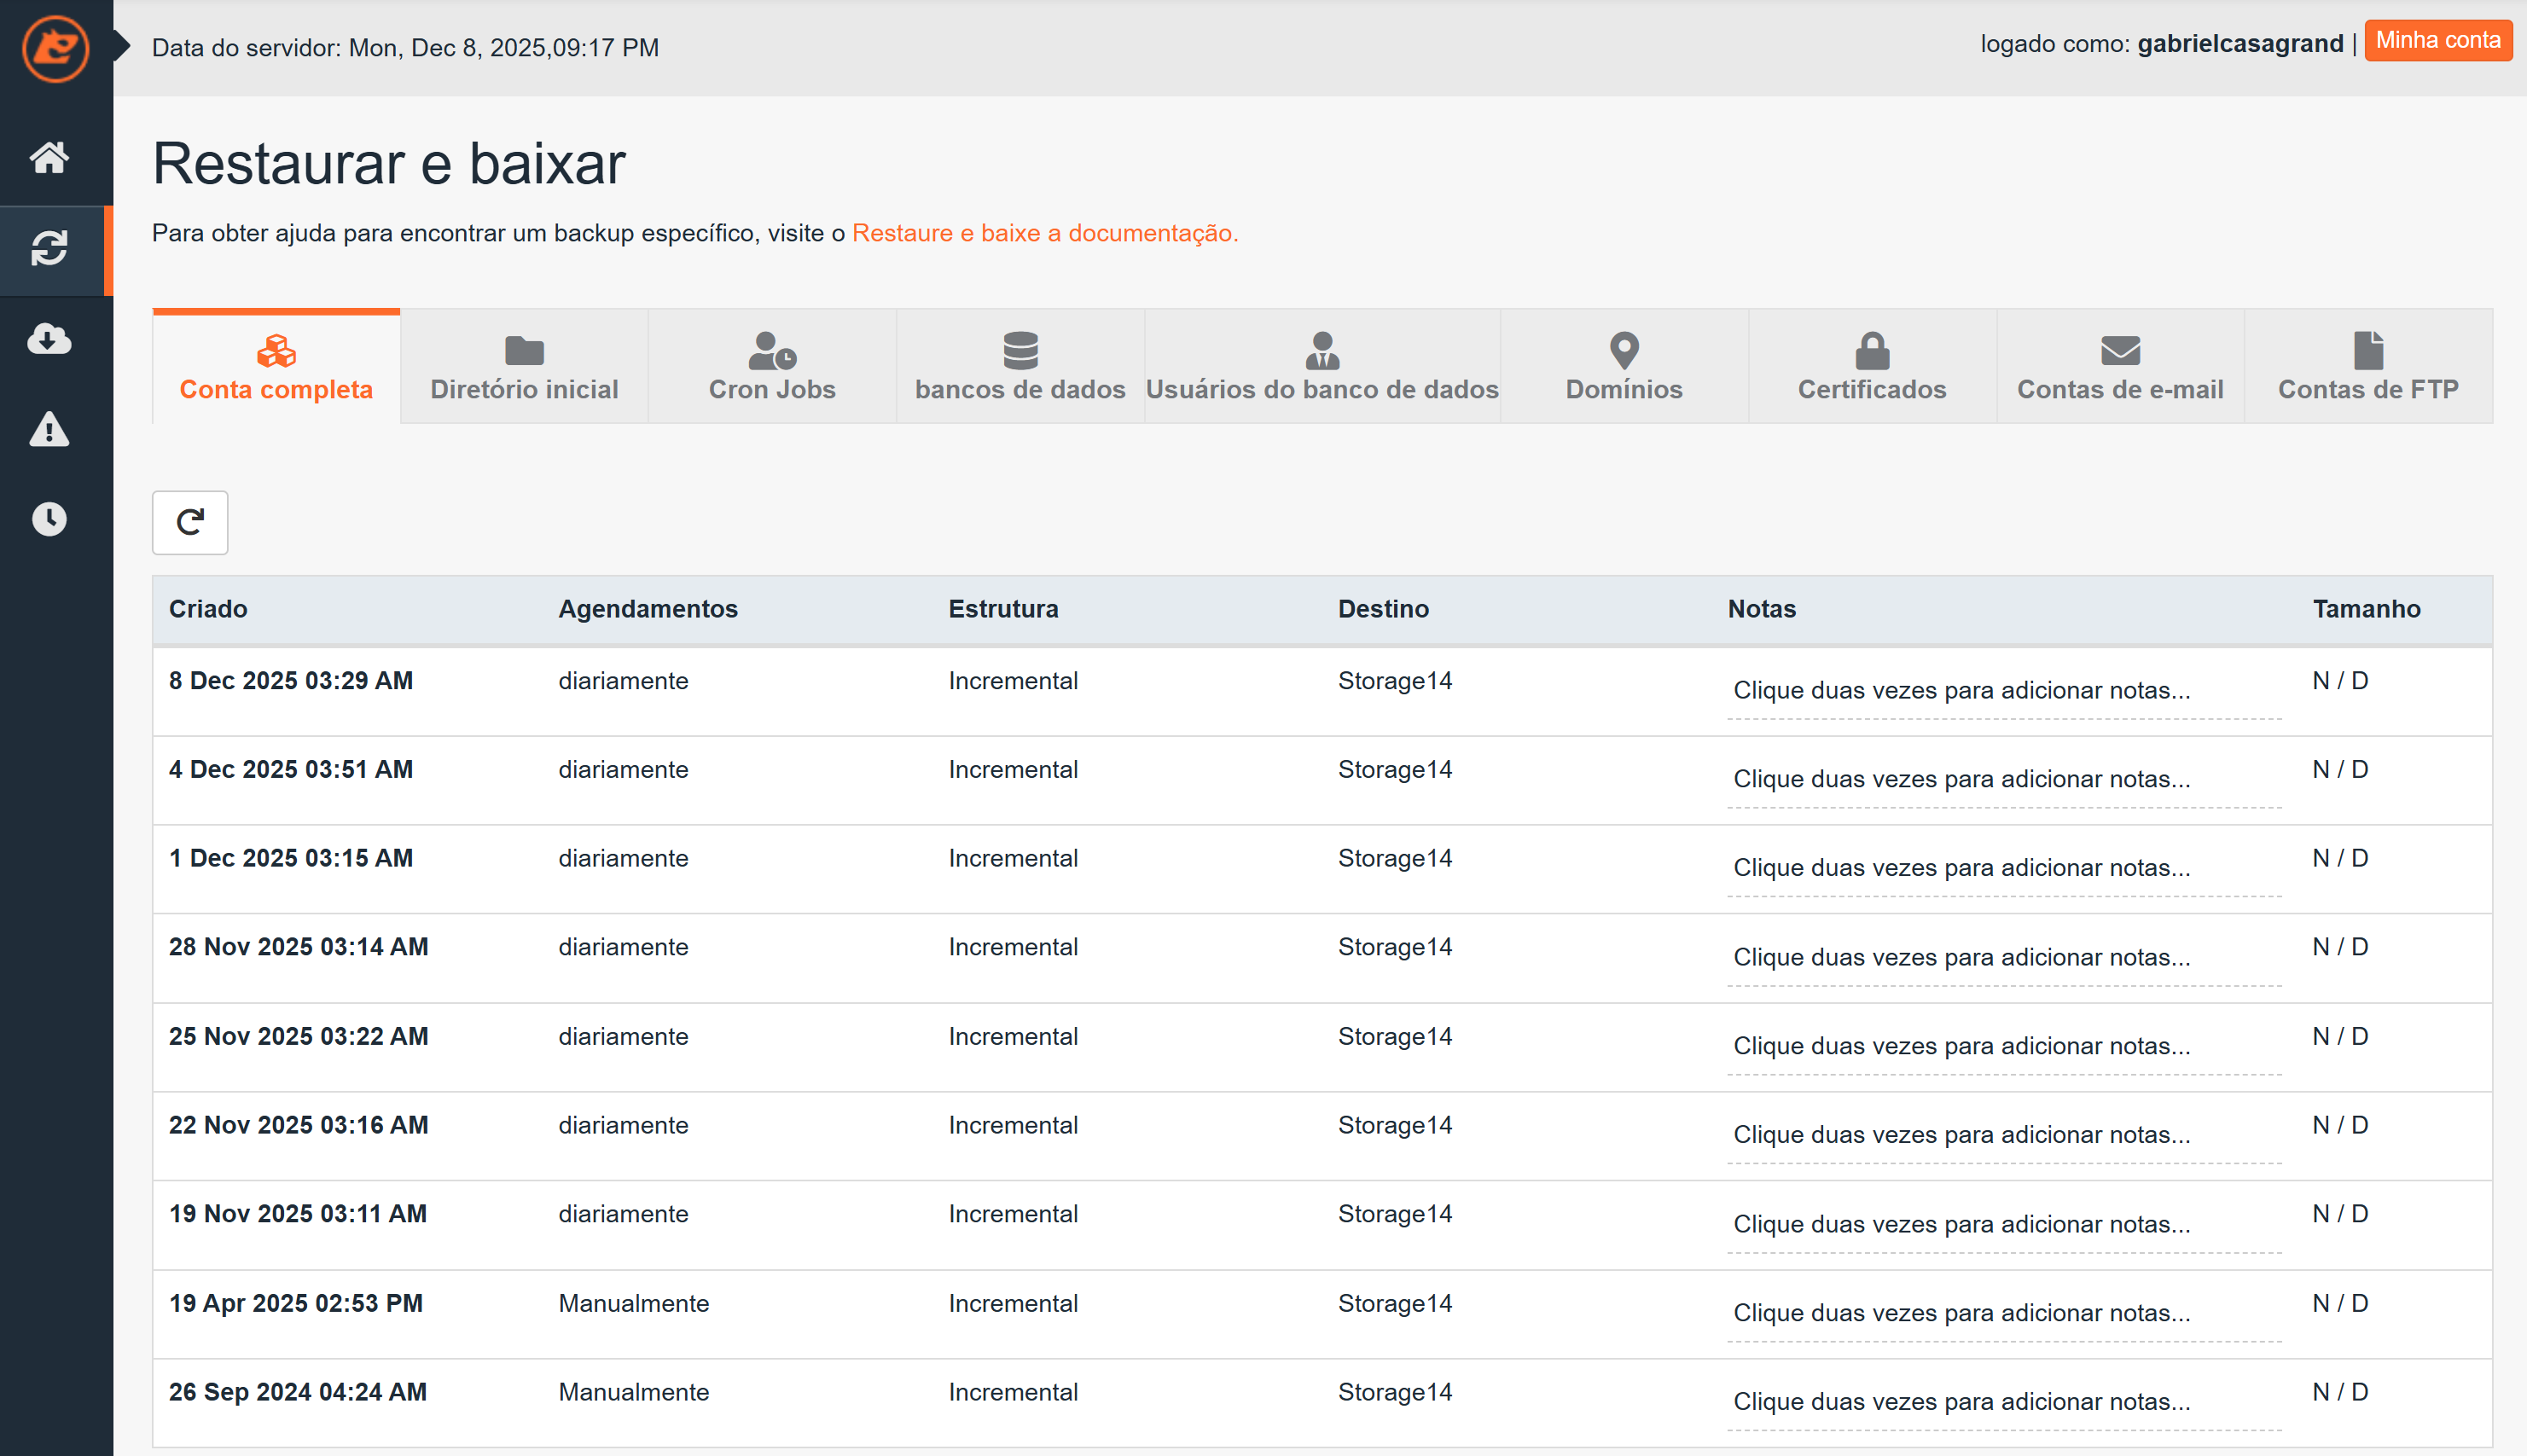
After selecting the backup date, two paths are possible:
3.1. Restore all files
Selecting the All files option ensures that JetBackup recovers the entire public_html directory.
3.2. Restore specific files or folders
Some issues do not require restoring the entire site. Partial selection prevents overwriting recent content.
Steps:
-
Click on Change file selection.
-
A window will be displayed with the complete structure of your hosting account.
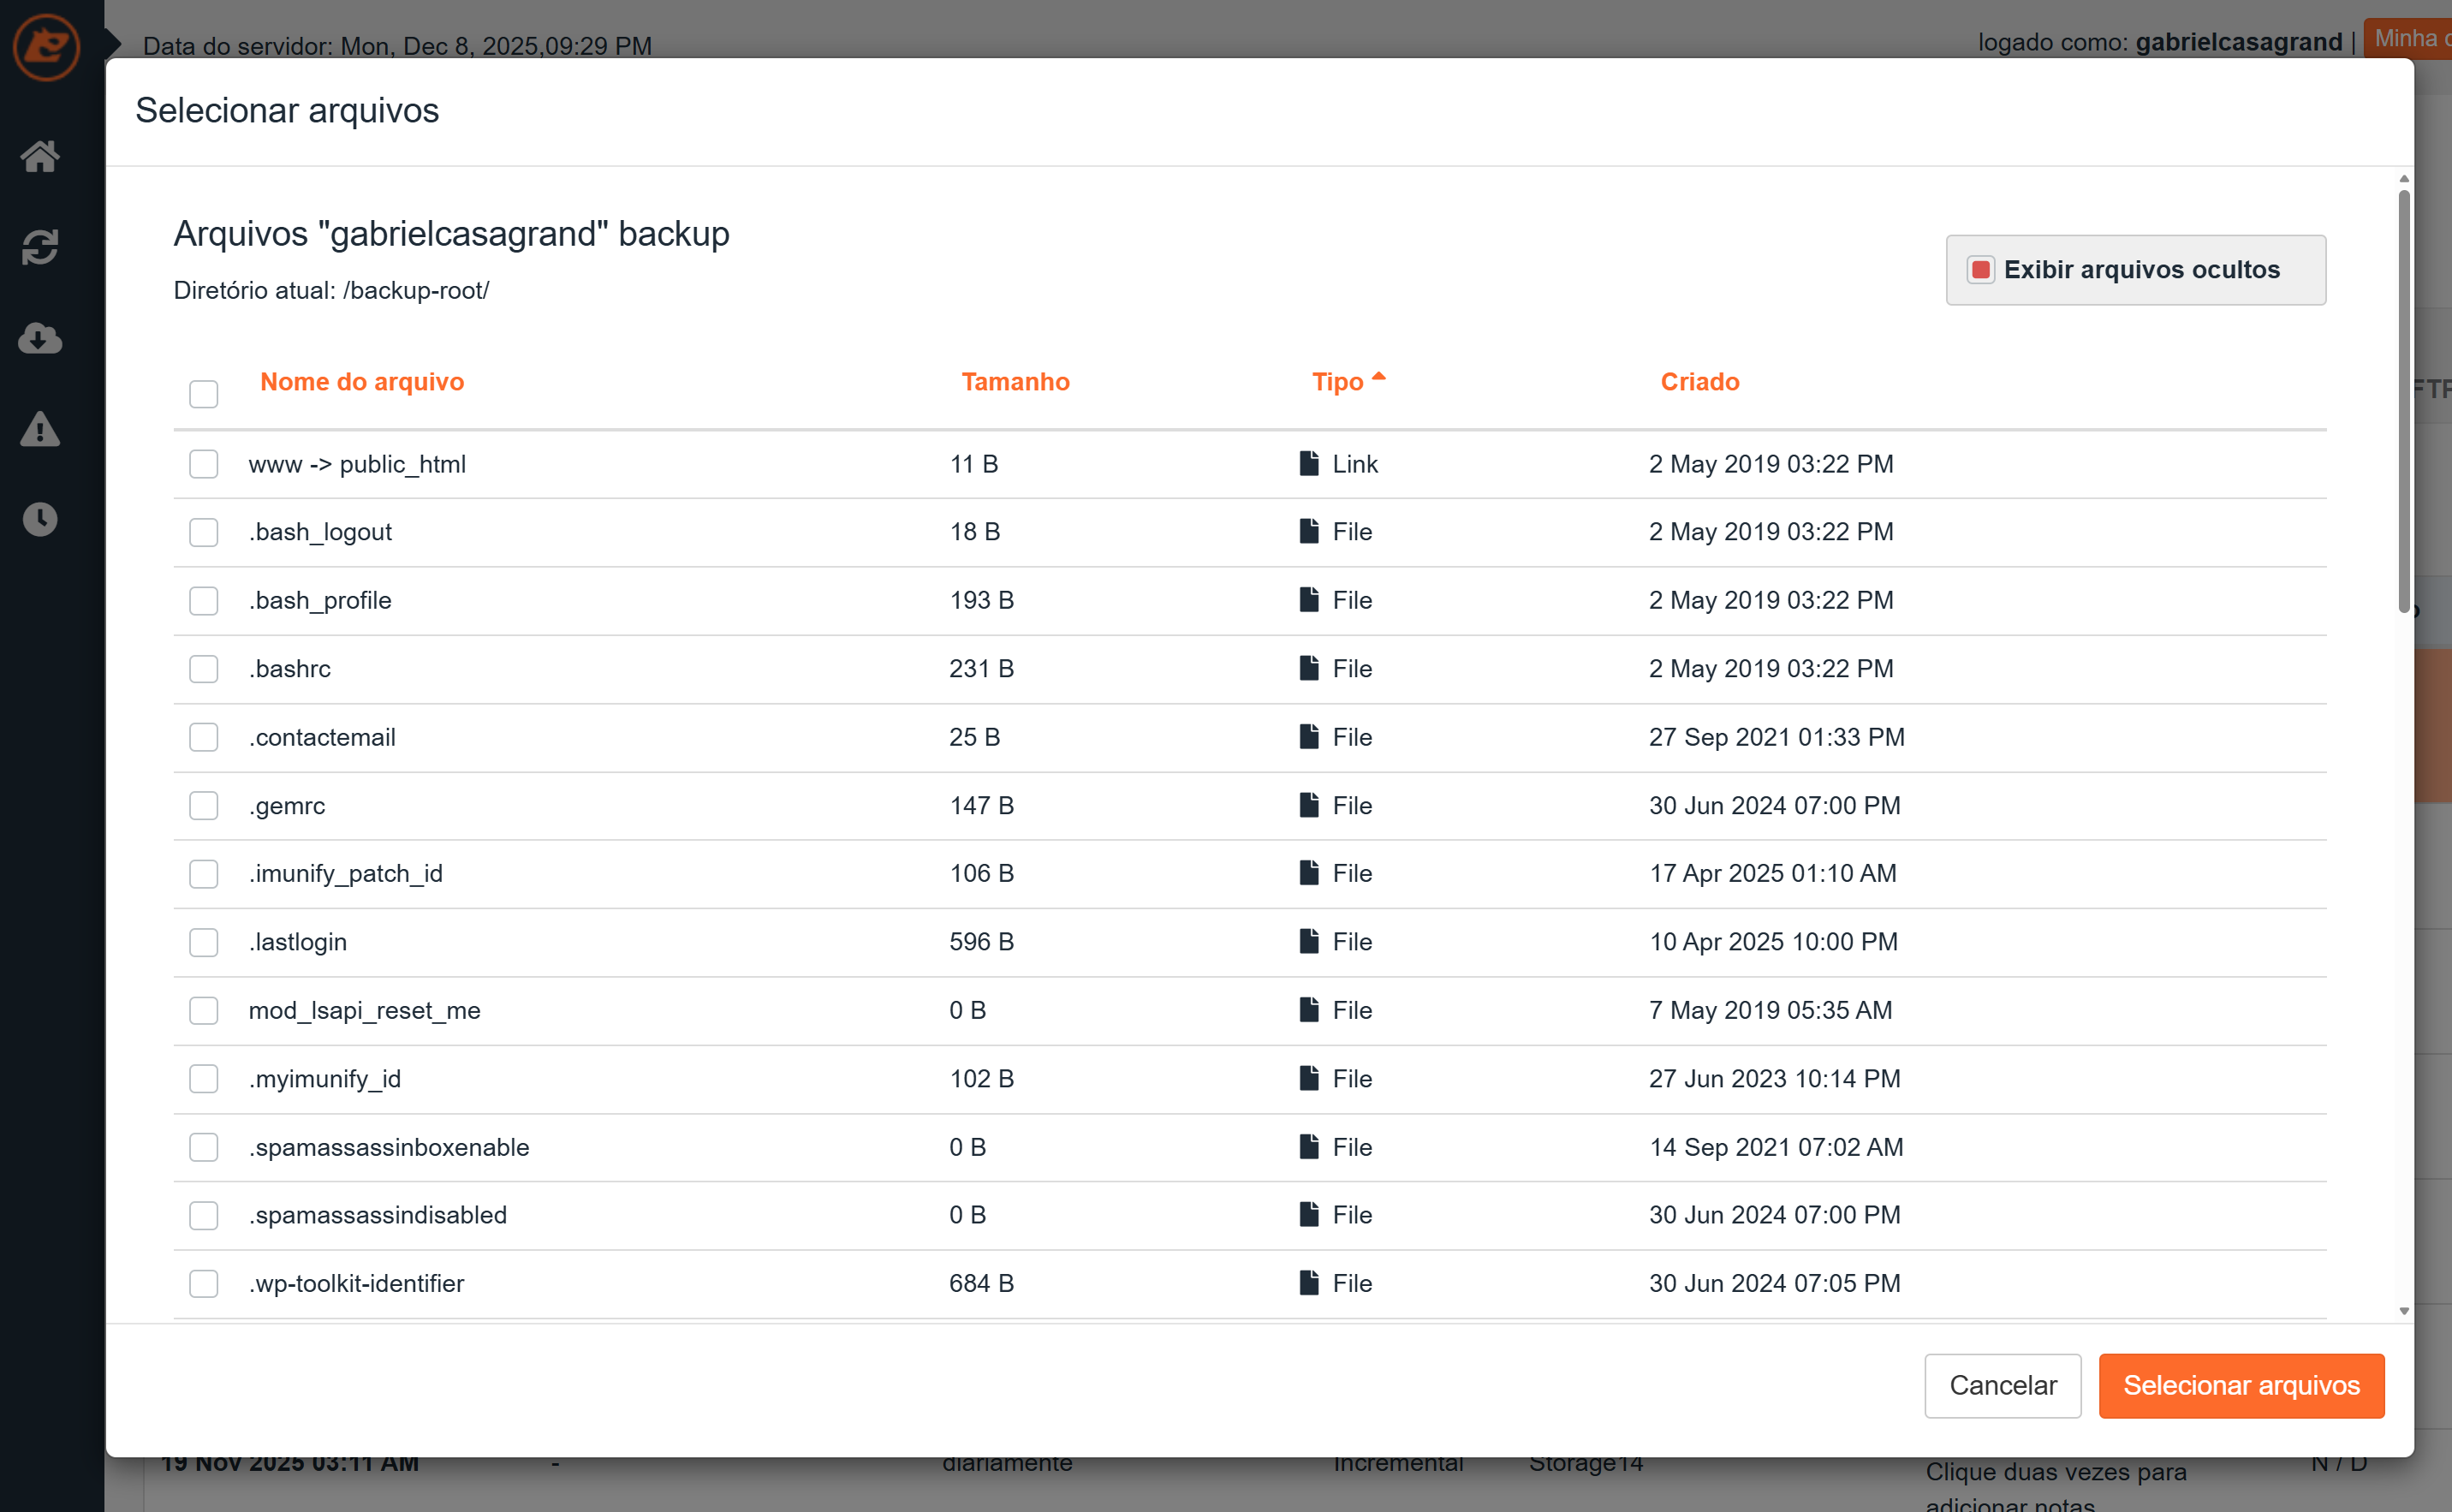
-
Check only the files you want to restore. To restore the entire site, select www -> public_html.
-
To restore only a single folder, such as wp-content, select only that one.
-
Click Select files and confirm the restore.
Important notes:
-
The www folder is just a symbolic shortcut to public_html. Restoring one or the other produces the same effect.
-
Files that start with a dot, such as .bashrc or .lastlogin, belong to the system. Do not restore these items unless you know exactly what you are doing.
-
Restoring part of the site without adjusting the database can generate inconsistencies. If in doubt, also restore the database.
4. RESTORE CRON JOBS
This section recovers scheduled tasks that were deleted or modified.
-
Access Cron Jobs.
-
Choose the date.
-
Confirm.
5. RESTORE DATABASES
To fix errors resulting from corrupted tables or incorrect changes.
-
Access Databases.
-
Choose the desired database.
-
Choose the date and restore.
The restore replaces all tables in the selected database. It does not change any website files.
6. RESTORE DATABASE USERS
Recovers permissions and passwords of database users.
7. RESTORE DOMAINS
Restores configuration of addon domains that were deleted or modified.
8. RESTORE SSL CERTIFICATES
Restores certificates that were removed, replaced or corrupted.
9. RESTORE EMAIL ACCOUNTS
Recovers mailboxes, messages and the entire account structure up to the selected date.
10. RESTORE FTP ACCOUNTS
Recovers accounts that were deleted or modified improperly.
11. MONITOR THE QUEUE AND MANAGE BACKUPS
At the bottom, JetBackup offers:
Manage account
Show downloads
Queue
Queue shows the progress of the restores.
Show downloads may contain files made available by the administrator, depending on the server configuration.
12. EXPORT FULL CPANEL BACKUP (NOT THROUGH JETBACKUP)
When the intention is to download the full account backup, generate a file for migration or save it locally, the correct path is not JetBackup. Use cPanel's native Backup.
Steps:
-
Access Files.
-
Click Backup.

The Generate full backup option creates a package containing:
-
Files
-
Databases
-
Emails
-
Settings
This backup is intended for download or migration. It is not used for immediate internal restoration.
