Step 1: Access your GoDaddy Account
- Go to the GoDaddy website (www.godaddy.com).
- In the top right corner, click on "Sign In" and enter your login credentials.
Step 2: Access the Domain Management Page
- Once logged in, click on your name or the profile icon at the top right of the homepage.
- From the dropdown menu, select "My Products".
- Scroll down to "Domains" and you will see a list of all the domains registered on your account.
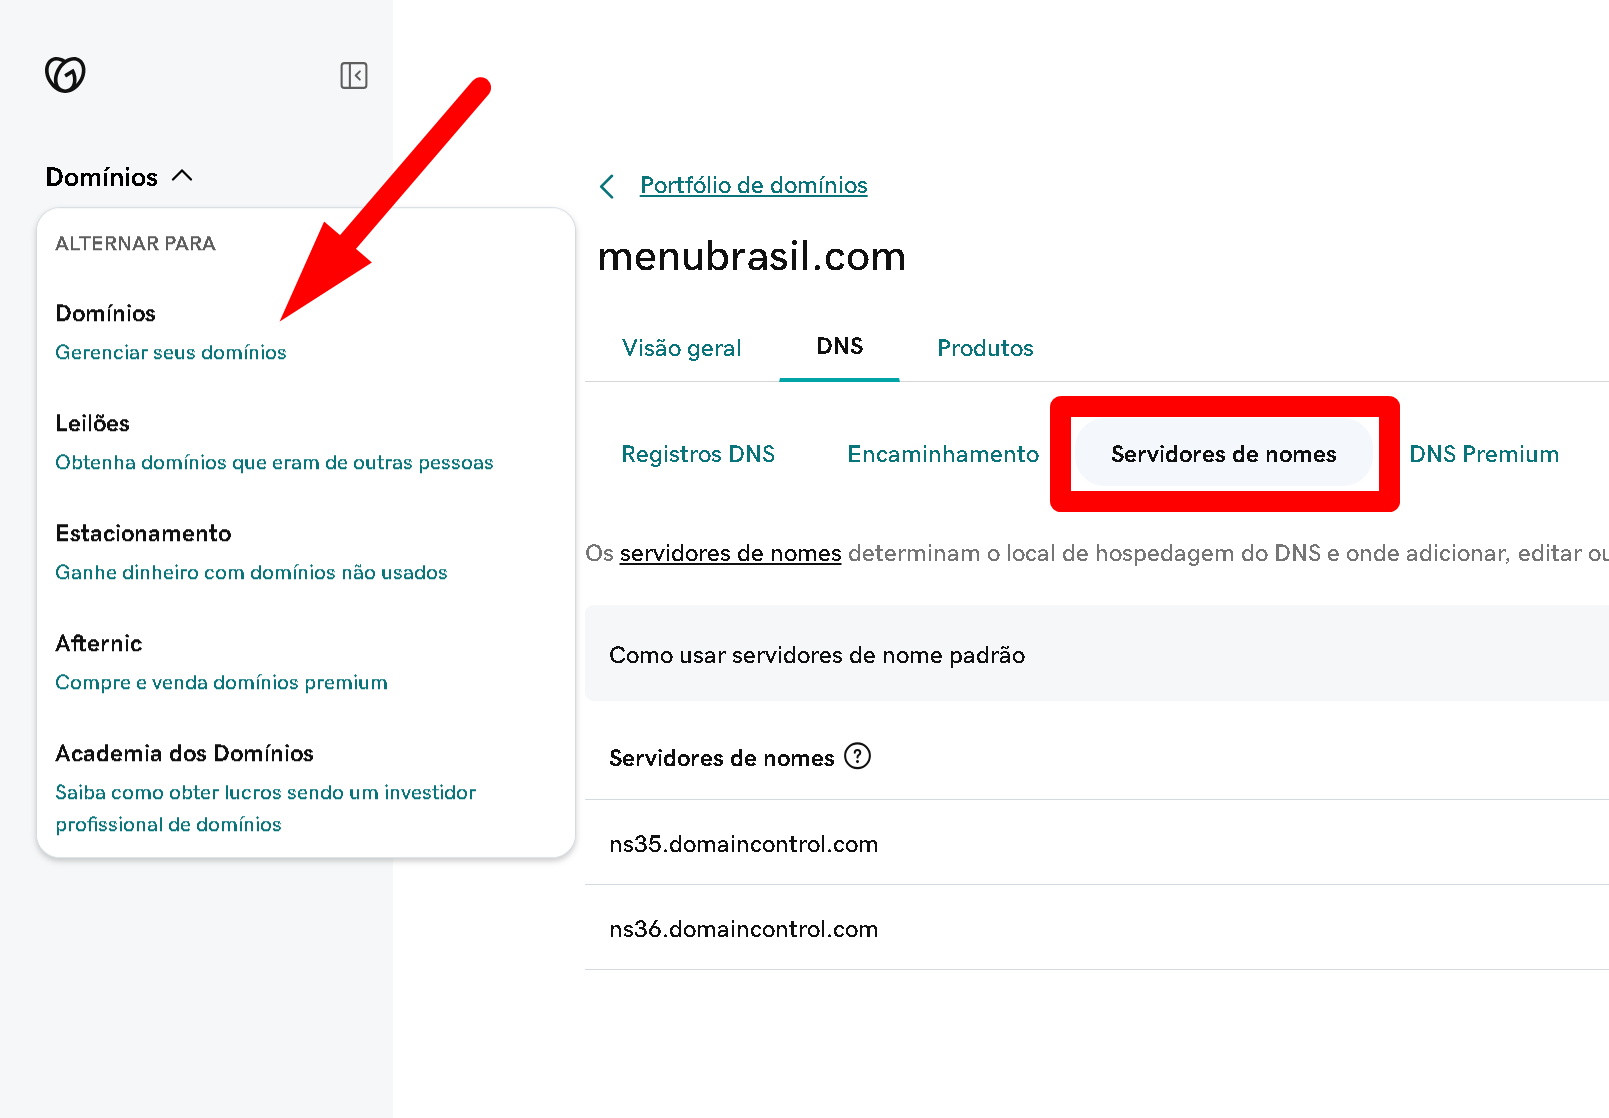
Step 3: Select the Domain to Change the Nameservers
- Next to the domain you want to modify, click on "DNS" or "Manage DNS".
Step 4: Access the Nameserver Settings
- On the DNS page, look for the "Nameservers" or "Name Servers" section.
- Click on the "Change" or "Change" button.
Step 5: Enter the New Nameservers
- Select the "Custom" option to manually enter the nameservers.
- Enter the addresses of the nameservers provided by your new hosting company. Typically, these are two or more addresses like
ns1.example.comandns2.example.com. - Make sure the nameserver addresses are correct.
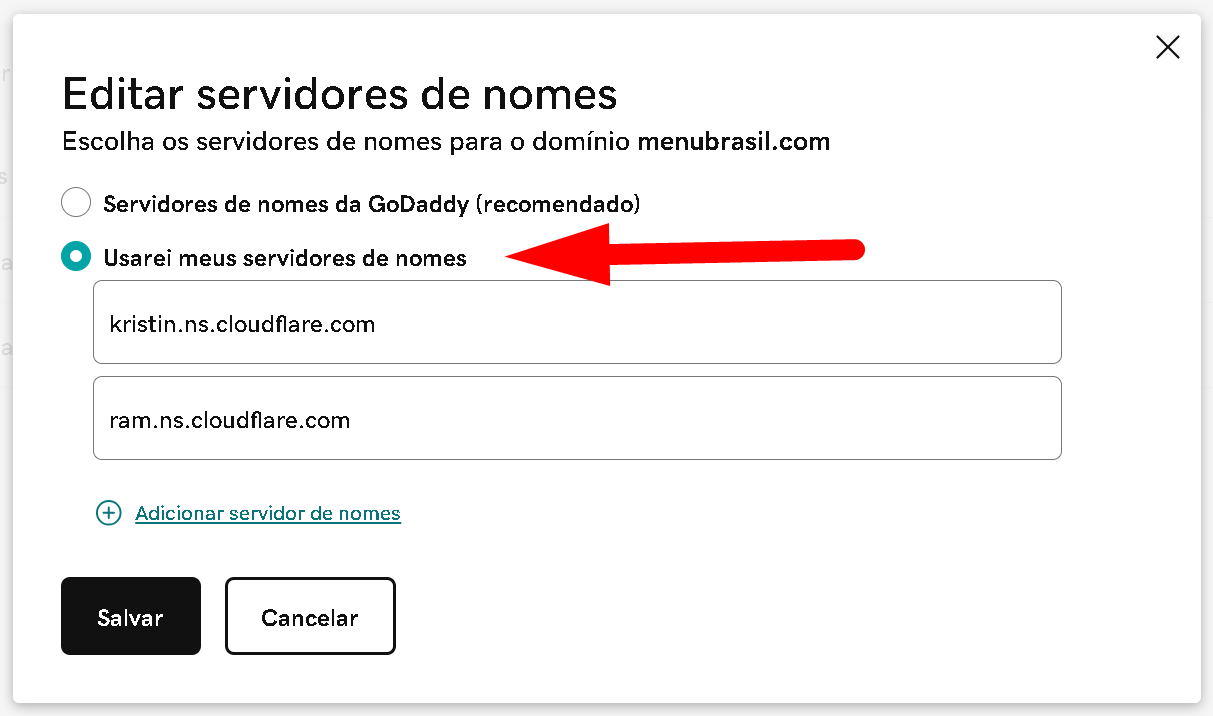
Step 6: Save Your Settings
- After entering all the required nameservers, click on "Save" or "Save".
Step 7: Wait for Propagation
- Changes to the nameservers can take up to 48 hours to fully propagate.
- During this time, your website may temporarily become inaccessible.
Additional Tips
- Before making any changes, it is advisable to write down the current nameservers in case you need to revert the changes.
- Make sure there are no typos in the nameserver addresses to avoid downtime problems.
I hope this tutorial helps you change your domain's nameservers at GoDaddy successfully! If you need more information, feel free to ask.
