Passo 1: Acesse sua conta GoDaddy
- Vá até o site do GoDaddy (www.godaddy.com).
- No canto superior direito, clique em "Sign In" e entre com suas credenciais de login.
Passo 2: Acesse a página de gerenciamento de domínios
- Uma vez logado, clique em seu nome ou no ícone de perfil no canto superior direito da página inicial.
- No menu dropdown, selecione "Meus Produtos".
- Role para baixo até "Domínios" e você verá uma lista de todos os domínios registrados em sua conta.
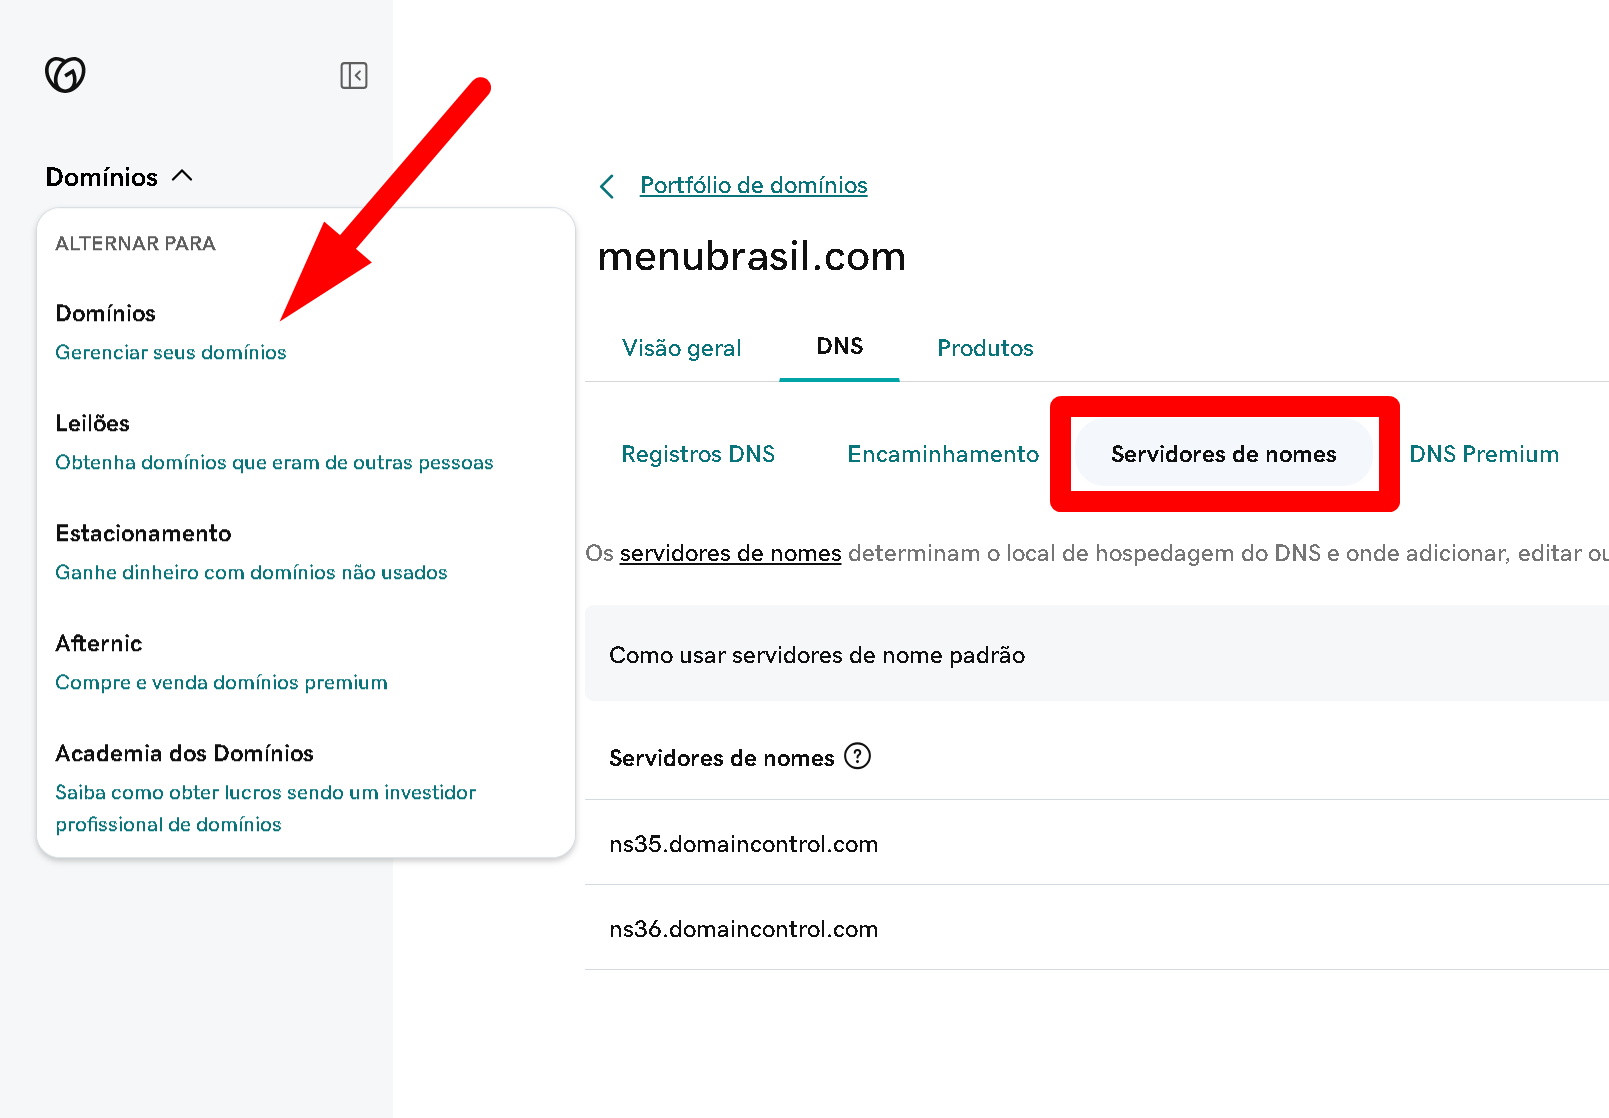
Passo 3: Escolha o domínio para alterar os nameservers
- Ao lado do domínio que você deseja modificar, clique em "DNS" ou "Gerenciar DNS".
Passo 4: Acesse as configurações de Nameserver
- Na página de DNS, procure a seção "Nameservers" ou "Servidores de nomes".
- Clique no botão "Alterar" ou "Change".
Passo 5: Insira os novos Nameservers
- Selecione a opção "Personalizado" para inserir manualmente os nameservers.
- Insira os endereços dos nameservers fornecidos pela sua nova empresa de hospedagem. Geralmente, são dois ou mais endereços do tipo
ns1.exemplo.comens2.exemplo.com. - Certifique-se de que os endereços dos nameservers estão corretos.
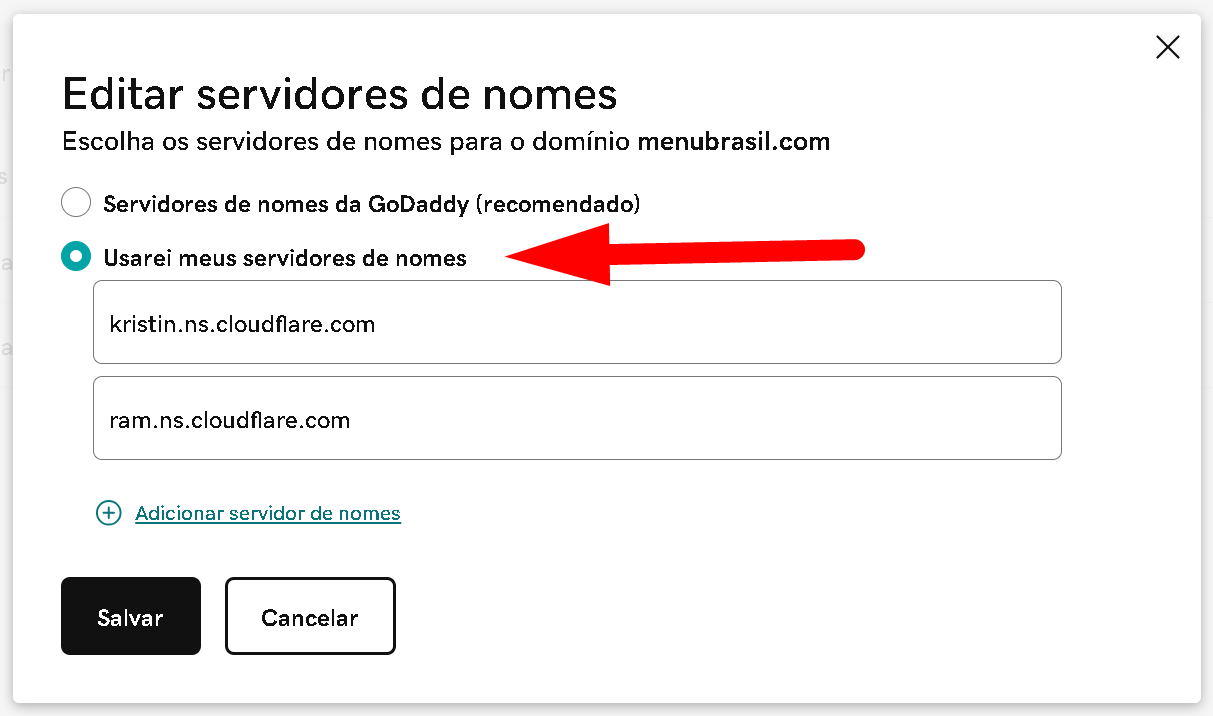
Passo 6: Salve suas configurações
- Após inserir todos os nameservers necessários, clique em "Salvar" ou "Save".
Passo 7: Aguarde a propagação
- As mudanças nos nameservers podem levar até 48 horas para se propagarem completamente.
- Durante este tempo, seu site pode se tornar temporariamente inacessível.
Dicas Adicionais
- Antes de fazer qualquer alteração, é aconselhável anotar os nameservers atuais caso você precise reverter as alterações.
- Certifique-se de que não há erros de digitação nos endereços dos nameservers para evitar problemas de downtime.
Espero que este tutorial ajude você a alterar os nameservers do seu domínio no GoDaddy com sucesso! Se precisar de mais alguma informação, fique à vontade para perguntar.
